We Ship Anywhere USA & Canada
step 1
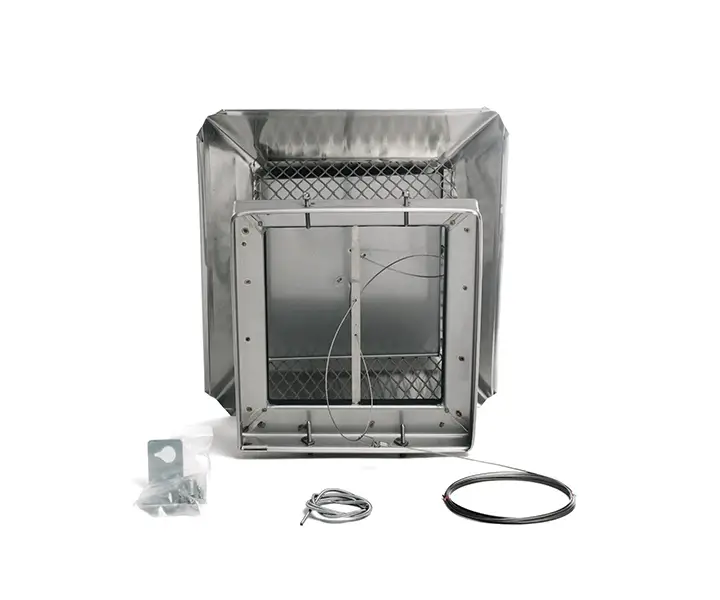
What you get in the box:
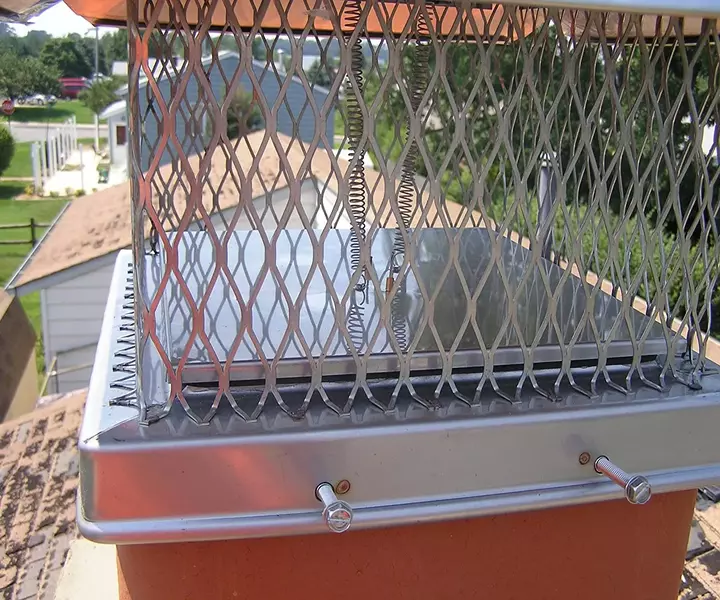
1. Cap-damper.
2. 32 ft. of SS cable.
3. Firebox Bracket pack.
4. SS cable casing.
5. Installation instructions, customer operating instructions and guarantee.
6. Sillicone.
Step 2
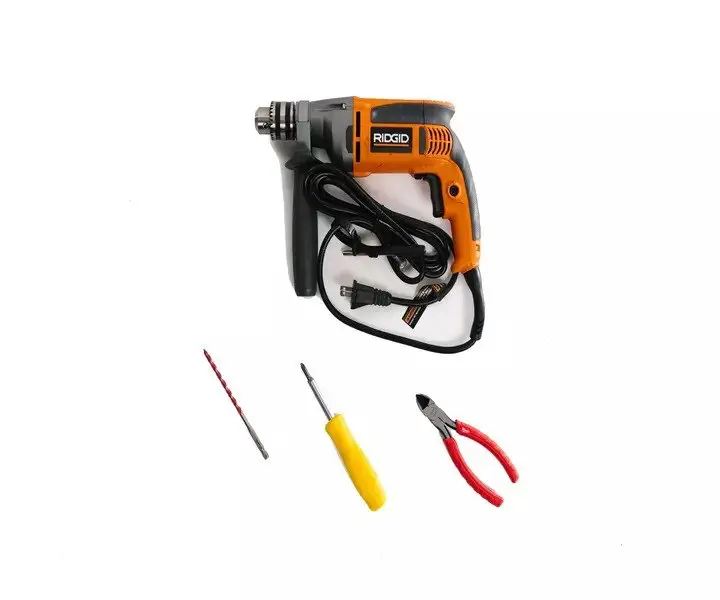
Tools needed:
1. Wire snips
2. Screw driver
3. 1/4 mansonry bit.
step 3
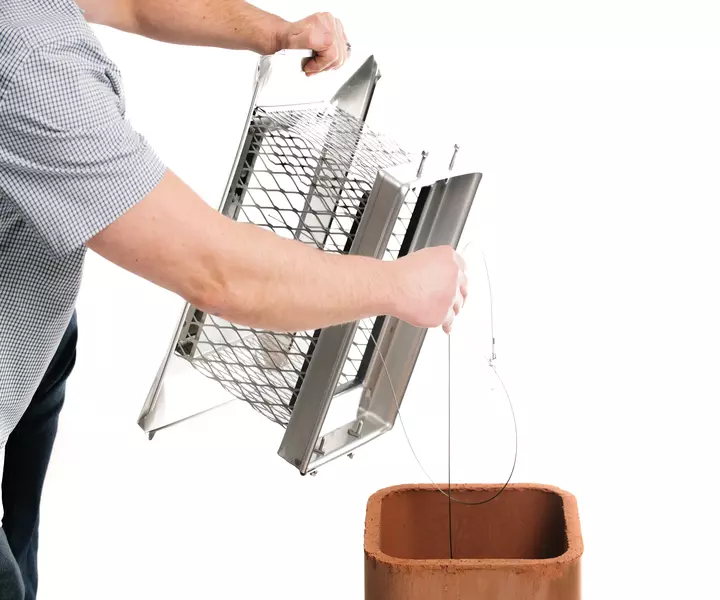
Take the tape off the cable and drop the cable down the flue.
Step 4
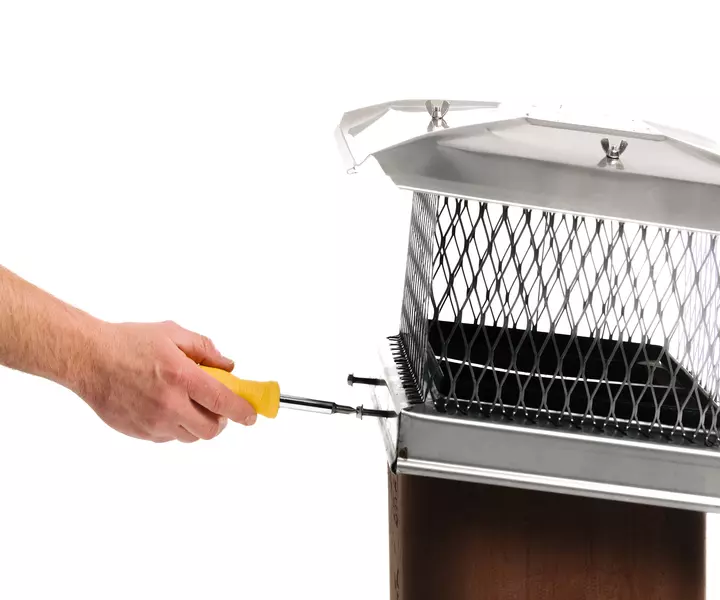
Tighten the screws on the cap-damper just like on a chimney cap. This completes the top installation. Go down to the firebox inside the house.
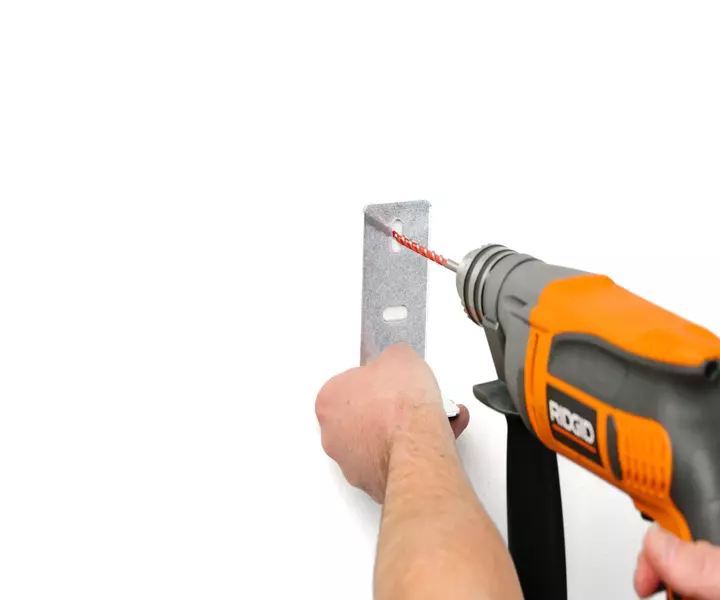
step 5
Position the firebox bracket about 2 feet above the fire floor. Position in a convenient place for the customer to use. Drill the top hole using a 3/16"
Mansory bit.
Step 6
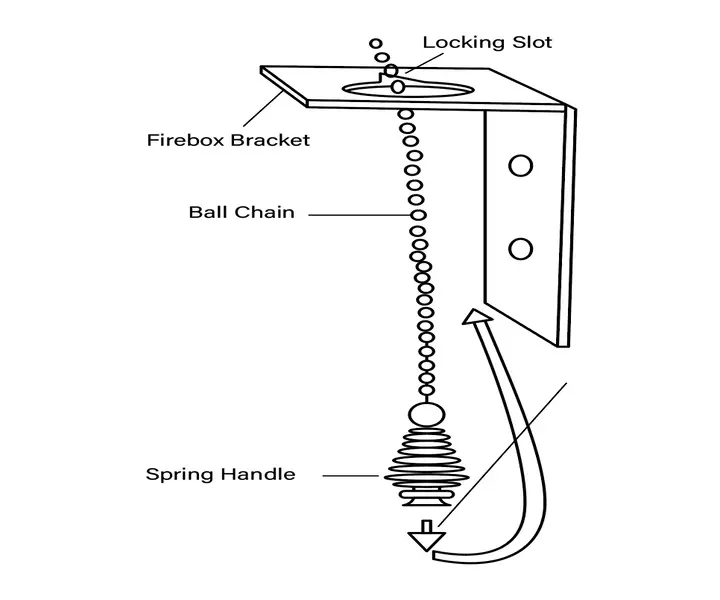
The slot in the firebox bracket should always be towards the rear. For the left-hand side of the firebox have the tail up, for the right-hand, tail down (as shown on the rest of the installation instructions).

step 7
Screw the tapcon and washer into the hole. Drill the lower hole and screw in the second tapcon.
Step 8
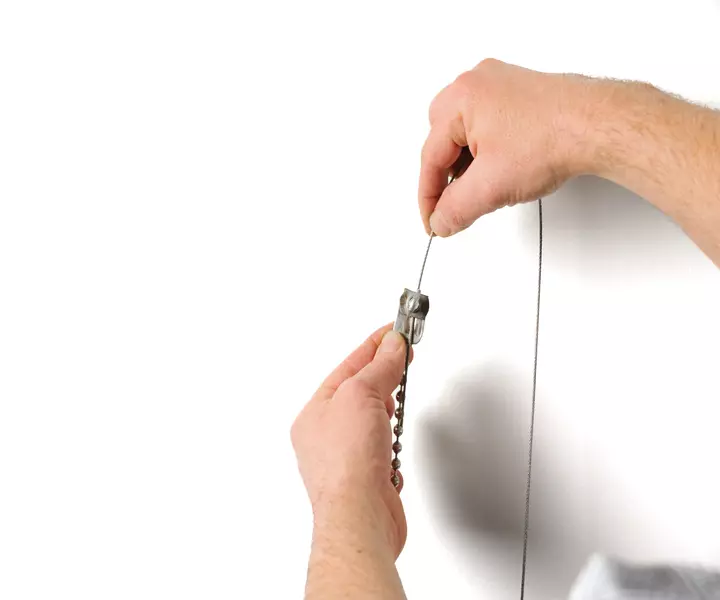
Thread the ball-chain handle assembly through the keyhole slot in the firebox bracket and let it hang.


step 9
Fish the SS cable from the smoke chamber. Thread the cable through the cable casing.
Step 10
Follow it with the cable casing lock (aluminum). Slide the cable casing and lock up the smoke chamber. Place the cable casing at this point and tighten the thumbscrew to secure the lock on the cable. The lock is to keep the cable casing from sliding down the cable.

step 11
Feed the cable through the lock on the ball-chain handle, tighten and make all adjustments to the system before you cut the cable.
Step 12
When everything looks right, double loop the cable through cable lock and cut, leaving about 2 or 3 inches of cable extra.
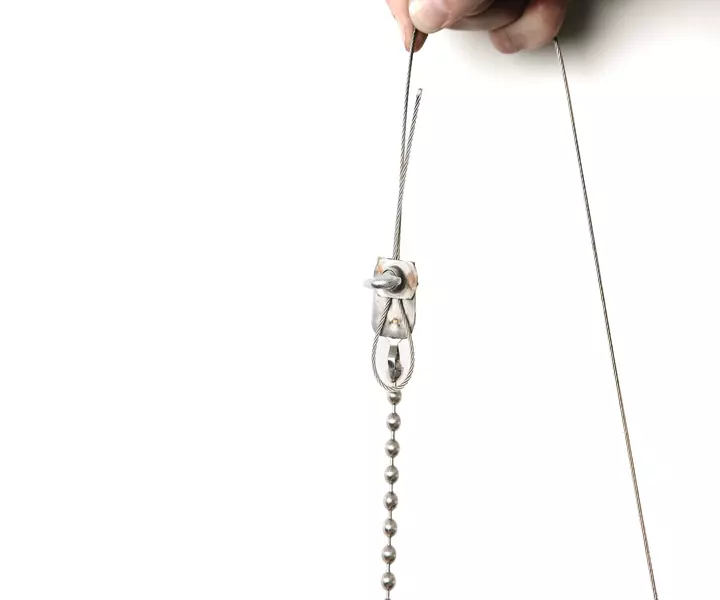

step 13
Completed firebox bracket and ball -chain handle. The installation is done! Show the customer how is works!
Step 14
HOME OWNER'S OPERATING
INSTRUCTIONS FOR CAP-DAMPER
(damper shown in closed position)
TO OPEN
1. pull down slightly on the spring handle ball chain from the locking slot.
2. move the spring handle toward you and up until it rests just below the firebox bracket.