How to Install a Chimney Cap: A Step by Step Guide – Chimcare Chimney Caps
Introduction
Installing a chimney cap is a crucial step in maintaining the integrity and efficiency of a chimney system. By placing a cap on your chimney, we can prevent water, debris, and animals from entering the flue, ensuring the safety and performance of our heating systems. It’s an essential task that not only safeguards against potential hazards but also extends the life of the chimney itself.
Embarking on this project may seem daunting, but with the right preparation and guidance, it can be completed with relative ease. We need to gather the necessary materials and tools, understand the type of cap suitable for our specific chimney, and follow a systematic installation process. Each step, from measuring the terraccata flue tile, the chimney liner or outside dimensions of the top of chimney, to securing the cap, plays a vital role in achieving a successful outcome.
For those who prefer a DIY approach, knowing when to call in a professional can provide peace of mind and ensure the installation is done correctly. We will explore these considerations while providing detailed yet straightforward instructions to help us confidently undertake the project.
Key Takeaways
- Installing a chimney cap prevents debris and animals from entering.
- Proper preparation and accurate measurements are necessary to ensure you are installing the correct chimney cap for your situation.
- Professional help may be needed for complex installations. Don’t hesitate to call a chimney cap professional!
Understanding Chimney Caps
Chimney caps are essential components for maintaining a safe and efficient chimney system. They serve multiple purposes, such as preventing downdrafts and protecting the interior from rain and debris. By installing a cap, we can ensure that unwanted elements like pests and moisture don’t enter the chimney flue.
There are various types of chimney caps designed to meet specific needs. Single-flue caps cover individual flues and are meant to attach to a terracotta flue tile. Custom chimney caps can cover several flues, offering comprehensive protection by covering the entire top of the chimney and shedding off water.
A round chimney cap is designed to fit round flue liners, while a rain cap specifically focuses on preventing water from entering the chimney. All these caps help in extending the lifespan of the chimney by reducing exposure to harmful elements.
When choosing a chimney cap, it is important to consider the material and style that best suits our needs. Common materials include stainless steel, copper, and galvanized steel. Each material offers different benefits, such as durability and aesthetic appeal.
Regular inspection and maintenance of chimney caps ensure they function effectively. By keeping them in good condition, we can avoid blockages and increase the efficiency of our fireplace systems.
Preparation for Installation
Before installing a chimney cap, it’s crucial for us to evaluate the current state of the chimney and ensure we have all the necessary tools. We’ll focus on assessing key features like the flue and the condition of the chimney crown, then gather essential tools such as a drill, screwdriver or cresent wrench.
Assessing Your Chimney
First, we need to identify if you have a terracotta flue tile and inspect the chimney flue tile. This involves checking the flue tile for any cracks or damages. If the flue is obstructed, a chimney sweep should be done by a professional to make sure there is no dangerous creosote or birds nest inside of the chimney flue.
If installing a custom outside mount chimney cap, we should inspect the top row of bricks and the cement mortar crown to make sure there are no loose bricks or large cracks that might not allow the chimney cap to stay on. Loose bricks or loose mortar on the chimney crown could cause the chimney cap to blow off which could cause harm to someone or a vehicle in the driveway.
Knowing the chimneys outside dimensions helps us to order the correct chimney cap for customer situations. Knowing your flue tile size allows you to order the correct chimney cap online. If confused or unsure of what to order, call the company you are ordering the cap from right away! We recommend taking photos and having measurements ready so the person that is helping you as the correct information to steer you in the right direction.
Gathering the Necessary Tools
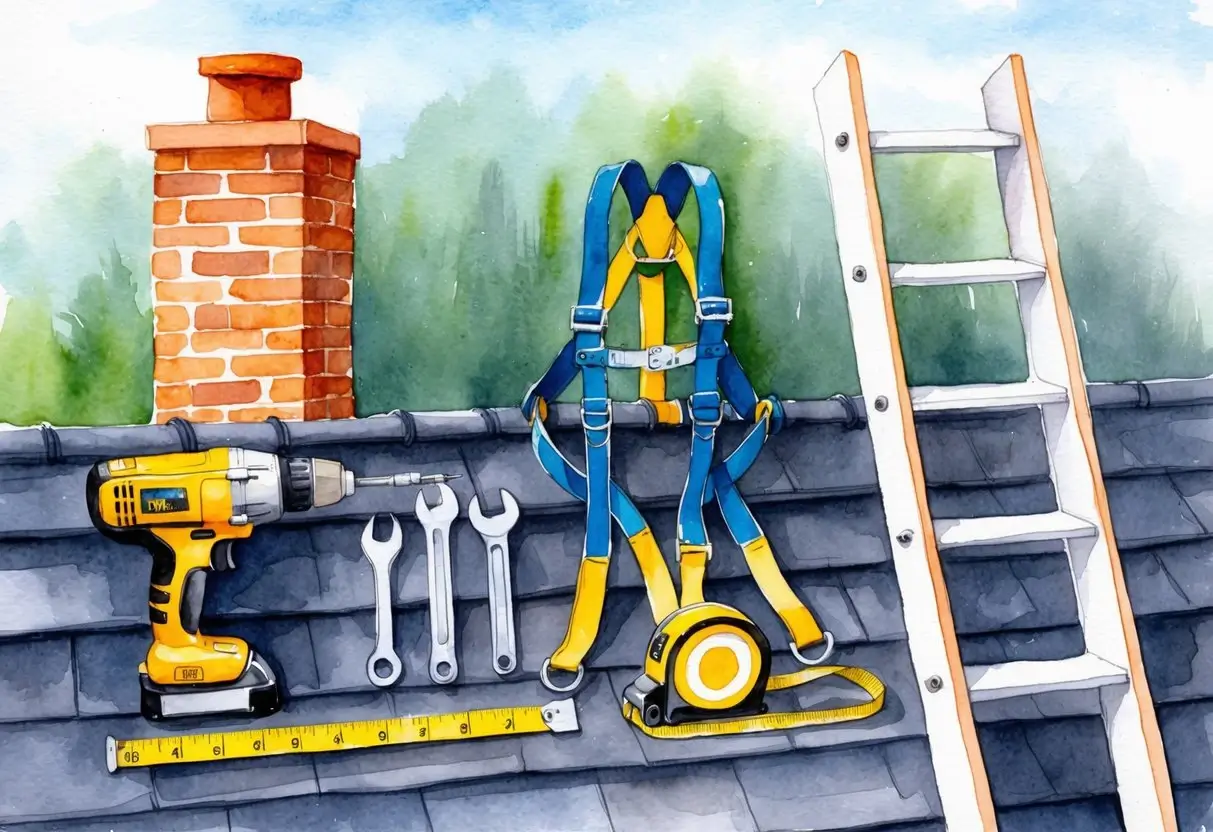
A variety of tools are essential for a successful installation. Most chimney caps can be installed with a 7/16 drill bit, a screw driver or a cresent wrench. Ladders and safety harnesses are important to safely access the roof. Depending on our cap type, various-sized wrenches or pliers may also be useful.
Step-by-Step Installation Process
When installing chimney caps, precision is crucial to ensure functionality and safety. We’ll explain the process for securing single-flue caps, installing outside mount chimney caps, and fitting caps to slip down inside of round flues. Each method requires a slightly different approach. Let’s dive into the initial steps.
Measuring for a Chimney Cap
Securing Single-Flue Caps
Securing a single-flue cap starts with selecting the correct size. Measure the outside dimension of the terracatta flue tile accurately. You will need to measure the outside length and width of the tile to ensure the cap will fit snugly. We often recommend stainless steel caps for durability. After selecting the cap, place it over the flue and use a screwdriver to fasten the screws through the cap’s flange to the flue’s sides. There should be 2 bolts per side to firmly tighten against all 4 sides. Tighten all screws evenly to ensure the cap remains level.
Installing Custom Made Chimney Caps
Customer made chimney caps cover multiple flues in a single operation, requiring a different approach. Begin by measuring the very top row of bricks on all sides. Sometimes chimneys are not squared up correctly and one side could be longer than the other. Always take the longest side dimension for your length and width.
Position the cap evenly and centered over the top of the chimney. The company that makes your custom chimney cap will make it usually ½” longer on each side. The chimney cap sides will slide over the chimney and down the sides approx. 3”. There should be at least 2 bolts per side. Hand tighten the bolts and make sure the cap is level and centered evenly on all sides. Once centered and level you can continue to make the bolts on all 3 sides nice and snug.
Fitting Caps to Round Flues
For round flues, you must first understand if you need a non-air cooled chimney cap or a non-air cooled chimney cap. Let’s take a quick dive into understanding which type of round cap you’ll need.
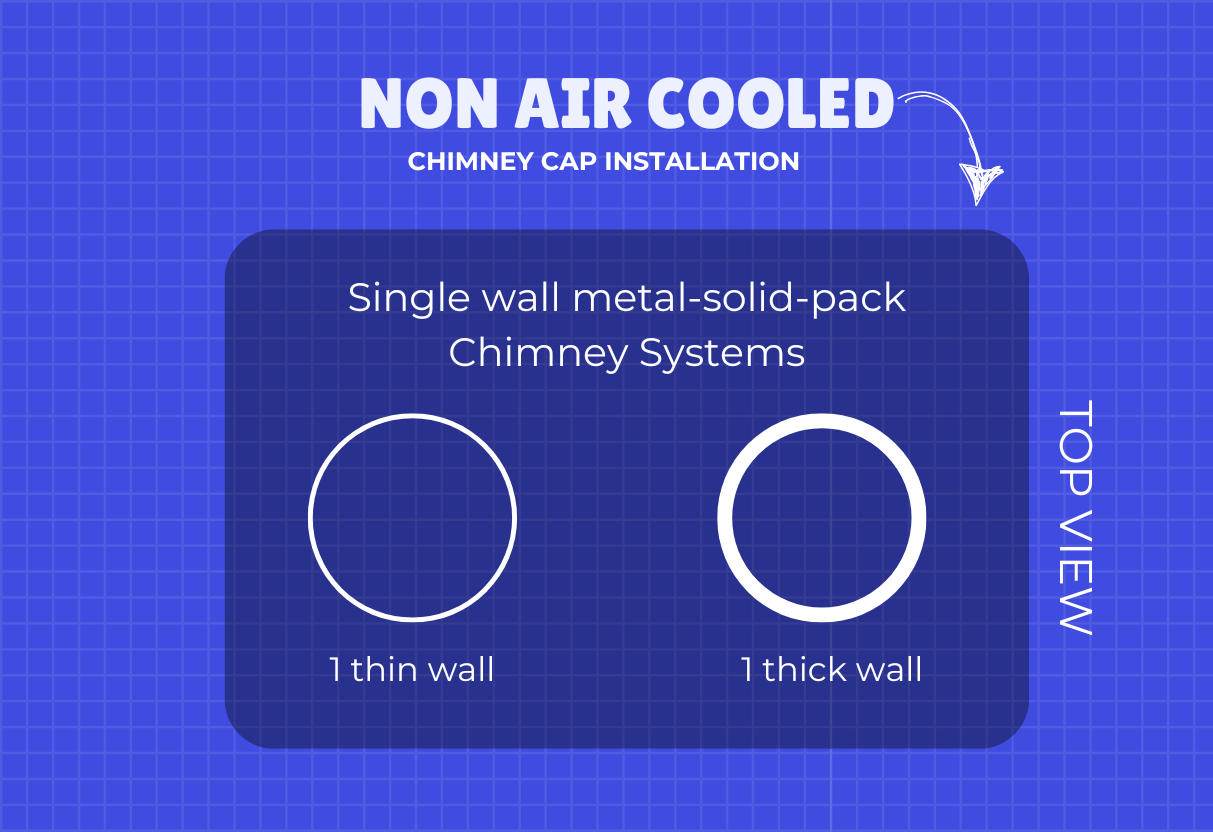
Non Air Cooled chimney caps have either a single thin wall or a thick double wall pipe. Please see the illustration below.
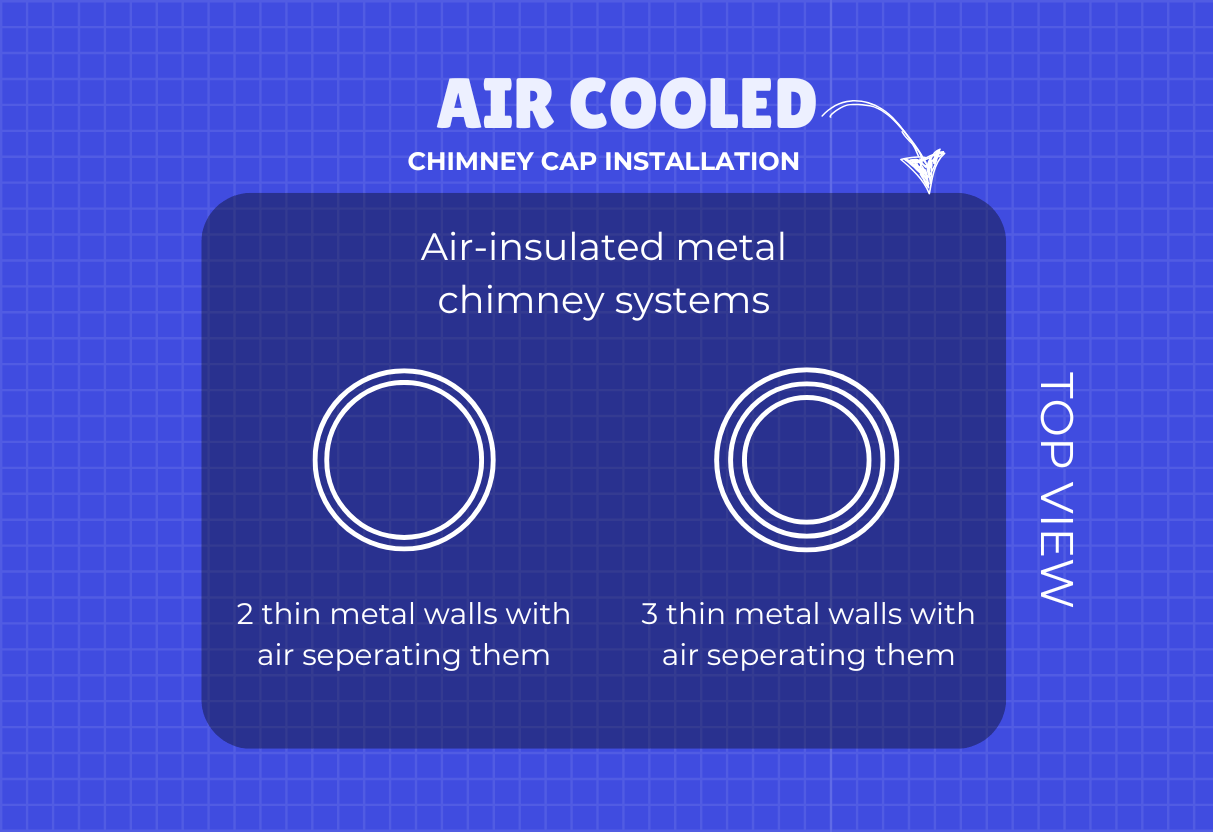
Air Cooled chimney caps have either two or three visible walls with air space in between the layers of pipe.
Once you have identified the correct style of chimney cap, you’ll need to measure the very inner diameter of the chimney pipe. The chimney caps are designed to slip down the very inner pipe.
With non air-cooled chimney caps, no hardware is needed to install them. They are designed to perfectly fit the diameter and slide down inside. Once inside they will not fly off.
With air cooled chimney caps there is band that will need to be tighten down against the exterior chimney pipe to hold the cap into place.
Ensuring Proper Ventilation

Proper ventilation is crucial for maintaining a safe and efficient chimney system. A chimney cap plays a significant role in this by protecting the chimney flue while allowing smoke and gases to escape.
When fitting the chimney cap, we need to ensure it’s appropriately sized. Too small, and it restricts airflow; too large, and it might not fit securely.
The chimney crown should be inspected to confirm it’s not obstructing the ventilation. A clear and properly designed crown prevents water from entering while maintaining airflow around the cap.
We should also check the flue liner for any blockages or damage. A well-maintained flue liner facilitates proper ventilation by providing a smooth path for smoke and gases to exit.
Installing a cap with a mesh guard can help keep debris and animals out without hindering airflow. Most chimney cap manufactures will automatically have spark screen installed but make sure you confirm! This is important to meet code standards, safety and to keep animals from building nest down inside your chimney.
To ensure the cap functions effectively, regular maintenance and cleaning of the chimney flue and chimney cap is necessary. This prevents buildup and maintains a clear path for airflow. Chimney caps due to get clogged.
When choosing a material for the cap, stainless steel, copper or powder coating can enhance durability and resist corrosion, ensuring long-term protection and performance. Try and stay away from galvanized chimney caps as they rust and do not have longevity.
When to Hire a Professional
It’s important to recognize when a professional is necessary for chimney cap installation. Safety is our top priority, especially when dealing with rooftops. If the roof is steep or the space around the chimney is limited, hiring an expert can prevent accidents.
We should also consider the tools and materials required. Without proper safety gear and equipment, such as harnesses and ladders, attempting this job could be risky. Professional chimney sweeps have the right tools and experience to ensure secure installation.
Experience plays a crucial role in the installation process. Hiring a professional guarantees that the chimney cap will fit correctly, which helps to avoid potential issues like leaks or ordering the wrong cap that doesn’t fit. You can also call and consult with a sales professional when ordering a chimney cap from an online website.
Another reason for seeking professional help is when the chimney is complex or older. In such cases, our best bet is to rely on those with specific expertise to handle any challenges that arise during the installation process such as chimney repair.
By using an expert, we also benefit from their installation guide and knowledge of local building codes. This ensures that everything complies with the relevant regulations, and we achieve quality installation.
If we’re uncertain or uncomfortable with DIY tasks, it’s best to consult a professional. This provides peace of mind, knowing that experts are handling the job efficiently and safely. Ordering from a reputable online company that offers customer service is a great choice in confirming you are ordering the correct size and chimney cap for your specific needs. Remember, not all chimneys are created and built the same. Also, sizes and dimensions vary greatly from chimney to chimney and across North America.
Frequently Asked Questions
Our guide addresses common questions about installing chimney caps, focusing on methods of attachment, self-installation feasibility, securing techniques, brick chimney considerations, average costs, and options when there is no existing flue.
What is the correct method to attach a chimney cap?
We recommend selecting the appropriate type of cap based on your chimney’s structure. Attachment typically involves securing it with bolts that hold the cap in place on the flue tile or against the outside of a chimney or pipe. It’s crucial to ensure a snug fit to prevent any movement due to wind or weather and to prevent it from flying off.
Is it possible for homeowners to install chimney caps on their own?
Yes, homeowners can often install chimney caps themselves, especially if they have basic DIY skills. Ensuring safety is paramount, so using stable ladders and suitable personal protective equipment is essential. For more complex installations, or for those uncomfortable with heights, hiring a professional may be advisable.
How are chimney caps secured to prevent them from shifting or blowing off?
Secure attachment typically involves the use of metal screws. Verifying that the cap is level and using multiple screws can enhance stability. Checking the cap’s fitting regularly can help in maintaining its position and preventing issues caused by high winds or severe weather conditions.
What specific considerations are needed for installing a chimney cap on a brick chimney?
Brick chimneys may require additional considerations, such as checking the mortar for stability and ensuring your have the right measurements to order a chimney cap that will fit specifically for your situation. When in doubt take lots of photos and measurements and call for help!
What is the average cost associated with professional chimney cap installation?
The cost of professional installation typically ranges between $75 and $500, depending on the complexity ease of access to get to chimney.
Chimney cap pricing can range depending on the material you choose, If its standard sizes for a flue tile or if you need a custom solution. Here is a guide you can expect.
The following estimated price ranges are for chimney caps designed to go on a terracotta flue tile.
Standard Stainless Steel Chimney Caps might range from $299 to $700
Powder Coated Black Chimney Caps have a similar price range of $250 to $700
Copper is a more elegant but most expensive – $600 to $1,200
Custom Outside Mount Chimney Caps might range from $600 to $4,000
How do you install a chimney cap if there is no existing flue?
For chimneys without an existing flue tile, a customer outside mount chimney cap is your solution. This type of chimney cap is specifically made for your exact chimney and will cover the entire top. This will protect your chimney as it keeps water of the top and sheds water away.

 We Ship Anywhere USA & Canada

