 We Ship Anywhere USA & Canada
The Complete Chimney Cap Checklist: A Step-by-Step Guide to Finding the Perfect Fit for Your Home

Introduction
Are you tired of dealing with wind gusts blowing down your chimney and filling your home with smoke? Or maybe you’re frustrated with small animals finding their way into your chimney and causing havoc? If so, then it’s time to invest in a chimney cap. But with so many options available, how do you find the perfect fit for your home? Don’t worry, we’ve got you covered with our complete chimney cap checklist.
In this step-by-step guide, we’ll walk you through everything you need to know to make an informed decision. From understanding the different types of chimney caps to determining the correct size and materials, we’ll help you navigate through the confusing world of chimney cap options.
With our checklist, you’ll be able to find the chimney cap that not only fits perfectly on your chimney but also provides all the benefits you’re looking for. So say goodbye to smoke-filled rooms and unwelcome critters, and say hello to a more enjoyable and hassle-free fireplace experience. Let’s get started on finding the perfect chimney cap for your home.
Why chimney caps are important for your home
A chimney cap is an essential component of any fireplace system. It provides protection for your chimney and offers several benefits for your home. Firstly, chimney caps act as a barrier, preventing rain, snow, and debris from entering your chimney. This is especially important during heavy storms or windy conditions when water can seep into your chimney, causing damage to the interior and potentially leading to costly repairs. Additionally, a properly installed chimney cap can prevent downdrafts, ensuring that smoke is directed up and out of your home rather than being blown back inside.
Another important function of chimney caps is to keep unwanted visitors out of your chimney. Birds, squirrels, raccoons, and other animals are known to nest in chimneys, causing blockages and creating fire hazards. Chimney caps with mesh screens or spark arrestors prevent these creatures from entering your chimney while still allowing smoke and gases to escape. By investing in a chimney cap, you can avoid the hassle of dealing with animal infestations and the potential damage they can cause to your chimney and home.
Lastly, chimney caps provide added safety for your fireplace. Sparks and embers that escape from the chimney can pose a fire risk, especially if they land on surrounding combustible materials. A chimney cap with a spark arrestor prevents these hot particles from exiting the chimney, reducing the risk of a fire starting on your roof or nearby vegetation.
Exploring the Variety of Chimney Caps from Chimcare
Chimcare offers an extensive selection of chimney caps, each designed to meet specific needs and enhance the functionality of your chimney system:
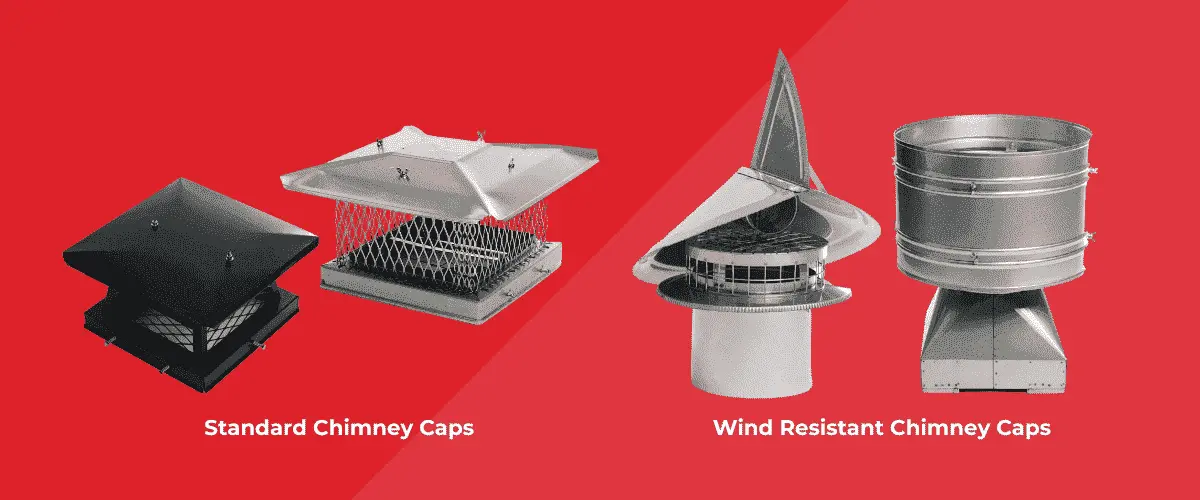
Standard Chimney Caps: These are essential for basic protection against the elements and intrusions. Options include standard caps, which are popular for their durability and effectiveness in keeping out rain and snow, and single wall caps, designed to cover single flue setups.
Wind Resistant Chimney Caps: Ideal for areas with high wind conditions, these caps help prevent wind-induced downdrafts that can disrupt your fireplace’s functioning. The collection features directional caps that adjust to shifting winds, ensuring efficient smoke flow, and high wind models that are robust enough to withstand severe conditions.
Custom Chimney Caps: For those who need a tailored solution, custom caps are available. These can be designed to match the specific measurements and aesthetic preferences of your home, ensuring both functionality and visual appeal.
Specialty Caps: This category includes uniquely designed caps such as chimney shrouds, which add a decorative touch while protecting your chimney, and fireplace flue dampers, which improve heat retention in your home. Chimney chase covers are also available for additional protection against weather extremes.
When selecting a chimney cap, consider the architectural style of your home, the typical weather conditions in your area, and specific needs like animal prevention or enhanced draft. Chimcare’s diverse offerings ensure that there’s a chimney cap to suit every requirement, blending style with functionality for optimal chimney care.
Factors to consider when choosing a chimney cap
Choosing the right chimney cap for your home requires careful consideration of several factors. Here are some key factors to keep in mind during the selection process:
- Chimney size and shape : The size and shape of your chimney will determine the type of chimney cap that will fit properly. Measure the dimensions of your chimney to ensure an accurate fit. Additionally, consider the shape of your flue. Some chimney caps are designed specifically for square or rectangular flues, while others are suitable for round flues.
- Material : Chimney caps are available in various materials, each with its own advantages and disadvantages. Stainless steel caps are durable, resistant to corrosion, and can withstand harsh weather conditions. Copper caps are aesthetically pleasing and develop a natural patina over time. Galvanized steel caps are more affordable but may not be as durable as stainless steel or copper.
- Mesh size : If you live in an area with a high bird population, choosing a chimney cap with a smaller mesh size is important to prevent birds from nesting in your chimney. The mesh size should be small enough to keep birds out but large enough to allow smoke and gases to escape freely.
- Installation method : Consider the installation method of the chimney cap. Some caps require professional installation, while others can be easily installed by homeowners. If you’re not comfortable with DIY projects, it’s best to hire a professional to ensure proper installation.
- Budget : Set a budget for your chimney cap purchase. The price of chimney caps can vary significantly depending on the material, size, and features. Determine how much you are willing to spend and look for options that fit within your budget while still meeting your requirements.
By considering these factors, you can narrow down your options and find a chimney cap that is suitable for your specific needs.
Measuring your chimney for the perfect fit
Before purchasing a chimney cap, it’s essential to measure your chimney accurately to ensure a proper fit. Here’s a step-by-step guide on how to measure your chimney:
- Measure the flue width : Start by measuring the width of your flue. Use a tape measure and measure the inside width of the flue opening. Take the measurement at both the top and bottom of the flue to account for any variations.
- Measure the flue length : Next, measure the length of the flue. Use a tape measure and measure from the top of the flue opening to the bottom, accounting for any protrusions or obstructions.
- Measure the outer dimensions : Measure the outer dimensions of your chimney to determine the size of the chimney cap needed. Measure the width and height of the chimney, as well as the depth from the front to the back.
- Consider the flue shape : If your flue is square or rectangular, measure the inside width and height of each side. If your flue is round, measure the diameter.
- Take note of any obstructions : Identify any obstructions on your chimney that may affect the installation of a chimney cap. This includes things like antennas, satellite dishes, or other protrusions. Make a note of their location and size to ensure that the chimney cap will fit properly.
Once you have accurate measurements, you can confidently select a chimney cap that will fit your chimney perfectly, providing optimal protection and performance.
Understanding chimney cap materials and their benefits
Chimney caps are available in different materials, each with its own set of benefits. Here’s an overview of the most common chimney cap materials and their advantages:
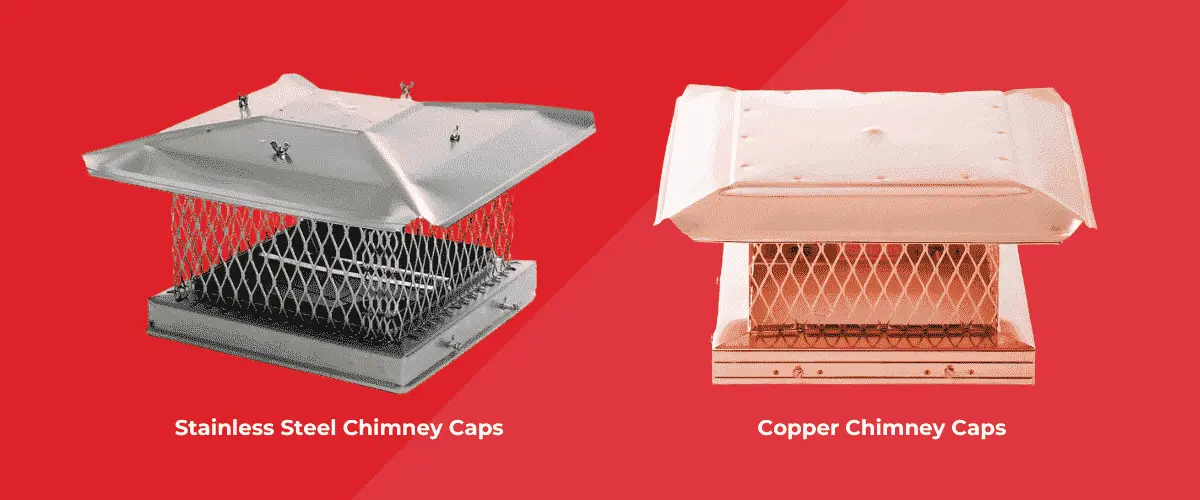
- Stainless steel : Stainless steel chimney caps are a popular choice due to their durability and resistance to corrosion. They can withstand harsh weather conditions, making them suitable for both coastal and inland areas. Stainless steel caps are low maintenance and can last for many years without needing replacement. They are available in various finishes, including brushed stainless steel and black powder-coated options.
- Copper : Copper chimney caps are known for their beauty and elegant appearance. They develop a natural patina over time, which adds a unique aesthetic to your chimney. Copper caps are highly durable and can last for decades with proper maintenance. They are resistant to corrosion and are an excellent choice for homeowners looking for a long-lasting, visually appealing option.
When choosing a chimney cap material, consider your specific needs and preferences. If durability and low maintenance are important to you, stainless steel or copper are excellent choices. If you’re on a tight budget, galvanized steel can provide adequate protection at a more affordable price point. Cast iron is a great option if you’re seeking a traditional and decorative look for your chimney.
Installation process for chimney caps
Installing a chimney cap can be done by homeowners, but it’s important to follow the correct installation process to ensure a secure and proper fit. Here’s a step-by-step guide on how to install a chimney cap:
- Gather the necessary tools : Before starting the installation, gather all the tools you’ll need. This may include a ladder, measurement tape, screws, a drill, and a screwdriver.
- Safety first : Always prioritize safety when working at heights. Use a stable ladder and ensure that it is properly positioned before climbing up. Consider having a helper assist you during the installation process.
- Prepare the chimney cap : If your chimney cap requires assembly, follow the manufacturer’s instructions to put it together. This may involve attaching brackets or mesh screens to the main cap structure.
- Position the chimney cap : Carefully position the chimney cap over the flue opening, ensuring that it is centered and level. If your chimney cap has adjustable mounting brackets, make any necessary adjustments to align it properly.
- Attach the chimney cap : Once the chimney cap is properly positioned, use screws and a drill to secure it to the chimney crown or flue tile. Be sure to follow the manufacturer’s instructions for the recommended screw size and placement.
- Check for stability : Give the chimney cap a gentle shake to ensure that it is securely attached. Make any necessary adjustments or tighten screws if needed.
- Test for proper airflow : After installation, test the airflow by lighting a small piece of paper and holding it near the flue opening. The smoke should be drawn up and out of the chimney, indicating that the cap is allowing proper ventilation.
If you’re not comfortable with DIY projects or if your chimney has specific installation requirements, it’s best to hire a professional chimney sweep or installer to ensure a proper and secure installation.
Maintenance and cleaning tips for chimney caps
Regular maintenance and cleaning of your chimney cap are essential to ensure optimal performance and longevity. Here are some tips to keep your chimney cap in top condition:
- Inspect regularly : Regularly inspect your chimney cap for any signs of damage or wear. Look for cracks, rust, or loose screws. Address any issues promptly to prevent further damage.
- Clean debris : Remove any leaves, twigs, or other debris that may accumulate on top of your chimney cap. Use a brush or broom to gently sweep away the debris. Be careful not to damage any mesh screens or spark arrestors.
- Check mesh screens : If your chimney cap has mesh screens, inspect them for any blockages or buildup. Birds or other animals may attempt to build nests in the mesh, obstructing airflow. Use a brush or vacuum cleaner to remove any debris or nesting materials.
- Remove rust : If your chimney cap is made of metal and shows signs of rust, clean it using a wire brush or steel wool. Remove any loose rust and apply a rust converter or primer to prevent further corrosion. Follow up with a coat of heat-resistant paint to restore the appearance of the cap.
- Trim nearby vegetation : Keep trees and shrubs near your chimney trimmed to prevent leaves and branches from falling onto the chimney cap. Falling debris can accumulate and block the mesh screens or spark arrestors.
- Schedule professional inspections : Regularly schedule professional chimney inspections and cleanings to ensure that your entire fireplace system, including the chimney cap, is in good working condition. A professional chimney sweep can identify any issues and provide the necessary maintenance or repairs.
By following these maintenance and cleaning tips, you can prolong the life of your chimney cap and ensure that it continues to protect your chimney and home effectively.
Common problems with chimney caps and how to troubleshoot them
While chimney caps are designed to provide protection and prevent issues, they may occasionally encounter problems. Here are some common problems with chimney caps and how to troubleshoot them:
- Animal nesting : If you notice signs of animal nesting in your chimney cap, such as chirping sounds or debris falling into your fireplace, it’s essential to address the issue promptly. Contact a professional chimney sweep to remove any nests and install additional measures, such as mesh screens or bird spikes, to prevent future infestations.
- Water leaks : If you experience water leaks despite having a chimney cap, there may be an issue with the installation or the condition of the cap itself. Inspect the cap for any cracks or gaps that may be allowing water to enter. If necessary, replace the cap or contact a professional to address the issue.
- Poor airflow : If you notice poor airflow or downdrafts despite having a chimney cap, there may be an issue with the cap’s design or installation. Consider installing a wind-resistant chimney cap specifically designed to minimize the effects of wind on your chimney. Additionally, ensure that the cap is properly installed and aligned to allow for optimal airflow.
- Rust and corrosion : Over time, metal chimney caps may develop rust or corrosion. This can compromise the cap’s integrity and appearance. If you notice signs of rust, clean the cap using a wire brush or steel wool, and apply a rust converter or primer. Follow up with a coat of heat-resistant paint to prevent further corrosion.
If you encounter any significant problems with your chimney cap that you are unable to resolve on your own, you can contact us for a professional solution.
Conclusion
In conclusion, a chimney cap is an indispensable addition to any home with a fireplace, offering significant benefits from improving airflow to preventing water damage and animal intrusions. This comprehensive guide has taken you through the essential steps to identify and select the right chimney cap for your home, considering factors such as size, shape, material, and specific needs like wind resistance or aesthetic appeal. By following the step-by-step processes for measuring, choosing, and installing a chimney cap, you can ensure that your fireplace and chimney function safely and efficiently. Remember, regular maintenance and prompt addressing of any issues will prolong the life of your chimney cap and keep your home safe. With the right chimney cap in place, you can enjoy a cleaner, safer, and more enjoyable fireplace experience.